By Fennie | 14 March 2021 | 2 Comments
How to Fix iPhone 11 Touch Screen Not Working - Step by Step
As we all know, it is difficult to weld the copper connector or other chips and elements on the tinned iphone button pad. On the contrary, it is easy to weld the tinned connectors on it. On that basis, we invented a tool that can add tin to the digitizer PCB connector of iphone and Android phone with parts from a broken iPad, and that has helped a lot in siding the efficiency of welding the connectors. In this article, we are going to share with you - How to replace the connector of the iphone11 without parting the layers.
Connect the screen on the iPhone 11, make a test, touch but no response. Replace the screen, still no reaction. So we take down the phone.

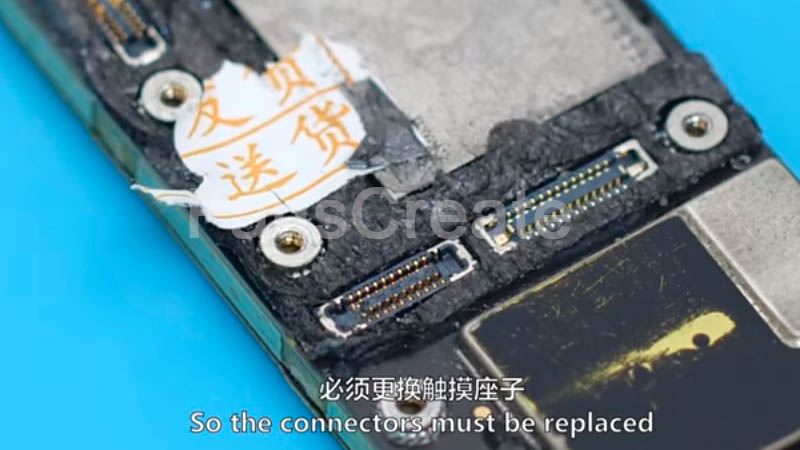
Unbolt the screw, and tear down its logic board. Inspect the digitizer PCB connectors on it, a faculty has been found. So the touch connector must be replaced.

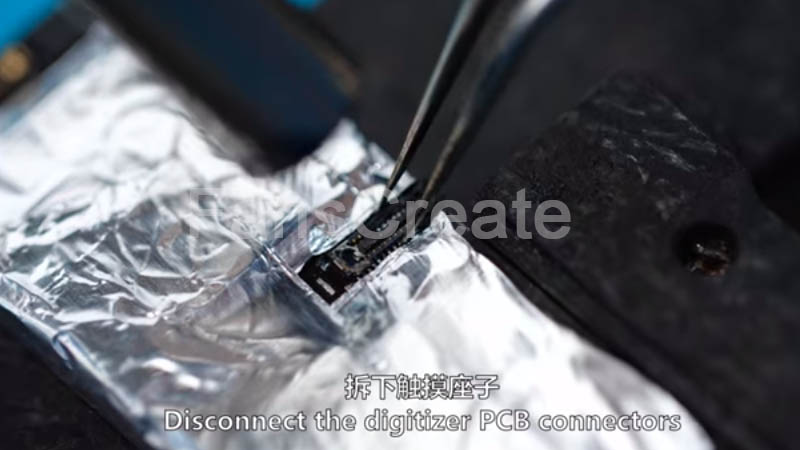
The lower layer might be pseudo-welded due to its double-lay structure, and in that way, we will be designed with more job, therefore we apply some aluminum foil around it. Blow it under the hot air gun, 380 degrees, with 40 wind. The soldering iron 380 degrees.

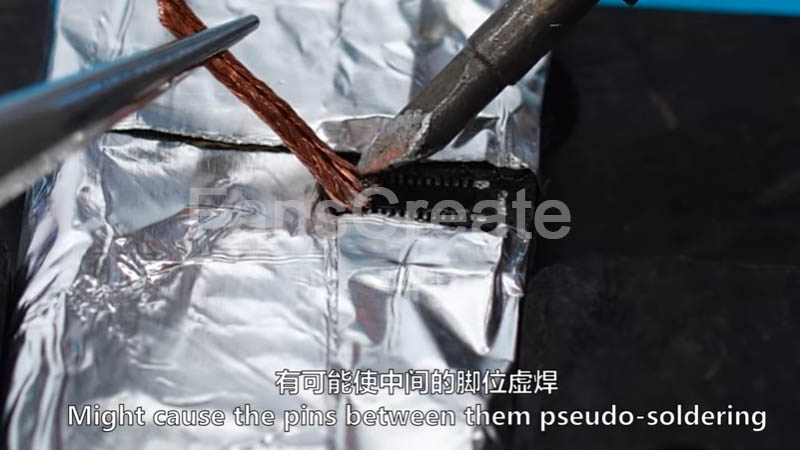
Disconnect the digitizer PCB connectors, apply some low-temperature tin on it, add some tin to the pins of the digitizer PCB connectors. On the logic board with a soldering iron carefully. First cover the tin on the whole area. Add some tin to the pins that are not fully-attached. Then get off the excess tin with solder braid. Apply the tin as little as we can to the two sides of the connectors or we add not tin, because the extra tin on the two sides of the connectors might cause the pins between them pseudo-soldering.

Apply some tin with a soldering iron to fulfill the pins, take out some aluminum foil, apply it on the connectors of this new iPhone 11. To protect the area where shouldn't be exposed to the tin. Set the temperature to 320 degrees, with 20 wind. Apply the tin on the connectors of this new iphone 11 to the iPad with a broken logic board. Meanwhile, add some tin on the pins on the other side. Apply a little soldering paste, not too much. The screen still gave no response when being touched. Measured the diode reading after welding. Add a little bit of tin to where the readings are abnormal with a tweezer to make the tin on this pin fully attached. We can see the diode is readings now. The screen display normally. Problem solved.

Conclusion
We prefer to replace the connectors on the broken logic board because their pins are all tinned, but the new digitizer PCB connectors of the new iPhone are copper pins without being tinned. Once they are welded on the logic board, the pseudo-soldering might occur, followed by soldering faculty. So we tin the pins first to get higher efficiency and better results in soldering the connectors.
Tools and Parts Used:
Screwdriver set
Pry bar
Tweezers
Hot air gun & Soldering iron
iPhone 11 digitizer PCB connector
Solder braid
Aluminum foil
You can also read Board Repair Tips of iPhone 7 Motherboard Swap - No Old Data Version
Connect the screen on the iPhone 11, make a test, touch but no response. Replace the screen, still no reaction. So we take down the phone.

Unbolt the screw, and tear down its logic board. Inspect the digitizer PCB connectors on it, a faculty has been found. So the touch connector must be replaced.

The lower layer might be pseudo-welded due to its double-lay structure, and in that way, we will be designed with more job, therefore we apply some aluminum foil around it. Blow it under the hot air gun, 380 degrees, with 40 wind. The soldering iron 380 degrees.

Disconnect the digitizer PCB connectors, apply some low-temperature tin on it, add some tin to the pins of the digitizer PCB connectors. On the logic board with a soldering iron carefully. First cover the tin on the whole area. Add some tin to the pins that are not fully-attached. Then get off the excess tin with solder braid. Apply the tin as little as we can to the two sides of the connectors or we add not tin, because the extra tin on the two sides of the connectors might cause the pins between them pseudo-soldering.

Apply some tin with a soldering iron to fulfill the pins, take out some aluminum foil, apply it on the connectors of this new iPhone 11. To protect the area where shouldn't be exposed to the tin. Set the temperature to 320 degrees, with 20 wind. Apply the tin on the connectors of this new iphone 11 to the iPad with a broken logic board. Meanwhile, add some tin on the pins on the other side. Apply a little soldering paste, not too much. The screen still gave no response when being touched. Measured the diode reading after welding. Add a little bit of tin to where the readings are abnormal with a tweezer to make the tin on this pin fully attached. We can see the diode is readings now. The screen display normally. Problem solved.

Conclusion
We prefer to replace the connectors on the broken logic board because their pins are all tinned, but the new digitizer PCB connectors of the new iPhone are copper pins without being tinned. Once they are welded on the logic board, the pseudo-soldering might occur, followed by soldering faculty. So we tin the pins first to get higher efficiency and better results in soldering the connectors.
Tools and Parts Used:
Screwdriver set
Pry bar
Tweezers
Hot air gun & Soldering iron
iPhone 11 digitizer PCB connector
Solder braid
Aluminum foil
You can also read Board Repair Tips of iPhone 7 Motherboard Swap - No Old Data Version
Recently Reviews
Read MoreLeave a Reply
Your email address will not be published.Required fields are marked. *
POPULAR BLOG
- How to Fix iPhone Xr Dim Backlight - Repair With New Backlight Module
- Aftermarket iPhone X Series Touch Issue After Screen Replacement Explained
- How to Fix iPhone X Ear Speaker No Working - Jump Wire Solution
- How to Fix iPhone With A Screw - Apple Wallet Payment Failure
- How to Fix iPhone 11 Touch Screen Not Working - Step by Step
ARCHIVES
CATEGORIES